A kitchen can feel completely different after the cabinets receive a fresh finish. Worn surfaces, faded colors, scratches, and outdated styles can make otherwise functional cabinetry look old, but replacing everything is not always necessary. Cabinet refinishing offers a practical way to refresh existing cabinets while keeping much of their original structure. From cleaning and sanding to applying primer, paint, stain, and protective finishes, every stage contributes to the final appearance. Understanding how Cabinet Refinishing San Jose CA works can help homeowners prepare for the project and appreciate the attention to detail required for a lasting result.
What Is the Cabinet Refinishing Process?
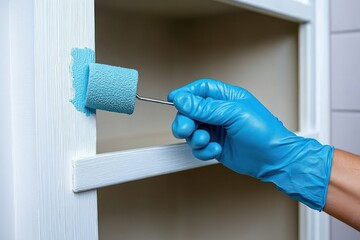
Cabinet refinishing restores or updates the visible surfaces of existing cabinets. Depending on the material and desired appearance, refinishing may involve cleaning, sanding, repairing, staining, painting, glazing, or applying a protective coating. Unlike cabinet replacement, refinishing generally keeps the existing cabinet boxes and focuses on improving their surfaces. This can make it an appealing option when the cabinetry remains structurally sound but looks outdated or worn.
The process can vary depending on the condition and material of the cabinets. Wood cabinets may be suitable for staining or painting, while laminate and other manufactured surfaces may require specialized preparation and primer. Existing coatings can also affect how the surface needs to be treated. Before work begins, evaluate the cabinets to determine the appropriate refinishing method. Proper planning can help prevent adhesion problems and ensure that the selected finish is suitable for everyday use.
Inspecting the Cabinets Before Refinishing
The first major stage involves inspecting the existing cabinetry. This helps determine whether the cabinets are good candidates for refinishing and identifies areas that may require repairs. Doors, drawer fronts, cabinet boxes, edges, and hardware should all be examined for damage. Scratches, dents, peeling finishes, loose components, and moisture-related problems may need attention before refinishing begins.
The structural condition of the cabinets is especially important. Refinishing can improve the appearance of surfaces, but it cannot correct major structural problems. Cabinets that are severely warped, damaged, or deteriorated may require more extensive work. If the cabinet boxes and doors are still stable and functional, refinishing may provide a practical way to improve their appearance. A careful inspection at the beginning can help establish realistic expectations for the project.
Removing Cabinet Doors and Hardware
Before surface preparation begins, cabinet doors and drawer fronts are often removed. Hardware such as knobs, handles, and hinges may also be taken off to make cleaning and refinishing easier. Labeling doors and hardware can help ensure that everything returns to its original position after the project is complete. This can be particularly useful when several cabinet components look similar.
Removing these components also allows painters to work more carefully on edges and detailed areas. Cabinet doors can be positioned on a suitable work surface where they are easier to sand and paint evenly. Hardware can be cleaned, replaced, or updated depending on the homeowner’s preferences. Taking time to organize the components at this stage can make the later reassembly process much easier.
Cleaning and Preparing the Surfaces
Cleaning is one of the most important steps in the cabinet refinishing process. Cabinets can accumulate grease, dust, food residue, cleaning products, and other contaminants over time. If these substances remain on the surface, they can interfere with the adhesion of primer, paint, or other finishes. The surfaces should therefore be thoroughly cleaned before sanding or coating begins.
After cleaning, the surfaces may need to be lightly sanded or otherwise prepared depending on the existing finish. Sanding can help remove loose material, smooth rough areas, and create a surface that allows the new coating to adhere properly. Scratches, dents, and small imperfections can also be repaired during this stage. Proper preparation may take considerable time, but it plays a major role in determining the quality of the finished cabinets.
Repairing Damaged Areas
Once the cabinets are clean and prepared, damaged areas can be repaired. Small dents, holes, cracks, and surface imperfections may be filled and sanded until they are smooth. Loose edges or components may also need to be secured before the finishing process continues. The goal is to create a stable and consistent surface that is ready to receive the new coating.
Repairs are especially important when homeowners want a smooth painted finish. Paint can sometimes make imperfections more noticeable rather than hiding them. A glossy or semi-gloss coating may reflect light across the surface, making dents and uneven areas easier to see. Taking time to correct imperfections before painting can help produce a more professional appearance.
Applying Primer
Primer can be an important part of cabinet refinishing, particularly when painting over certain materials or existing finishes. It can improve adhesion and create a more consistent base for the finish coat. Some surfaces may require a bonding primer because they are naturally smooth or difficult for standard paint to adhere to. The appropriate primer depends on the cabinet material and the type of finish being applied.
Primer should be applied evenly and allowed to dry according to the product instructions. Once dry, the surface can be inspected for imperfections that may still require attention. Light sanding may be used when appropriate to create a smoother base for the final coating. Rushing through the primer stage can affect the appearance and durability of the final finish, so sufficient drying and preparation time are important.
Applying Paint or Stain
After the surface has been properly prepared and primed when necessary, the new finish can be applied. Homeowners may choose paint, stain, glaze, or another coating depending on the desired appearance. Paint can completely change the color of the cabinetry, while stain can enhance the natural character of suitable wood surfaces. The chosen product should be compatible with the cabinet material and intended use.
The application method can vary depending on the project. Brushes and rollers can provide control for certain areas, while spray equipment may be used to create a smooth and uniform finish. Multiple coats may be necessary to achieve the desired color and coverage. Each coat should be allowed to dry properly before the next one is applied. Applying several controlled coats can produce better results than attempting to achieve full coverage with one heavy application.
Sanding Between Coats When Needed
Sanding may be incorporated at different points throughout the refinishing process. Light sanding between coats can help smooth minor imperfections and improve the appearance of subsequent layers when appropriate for the coating system. The goal is not to remove the finish but to create a smoother surface for the next application. Care must be taken to avoid sanding through the coating.
Dust should also be carefully removed after sanding. Remaining dust particles can become trapped in wet paint or finish and create an uneven texture. A clean work area is therefore important during cabinet refinishing. Proper sanding and cleaning between stages can contribute to a smoother and more consistent final appearance.
Applying the Final Protective Finish
Depending on the chosen refinishing system, a protective topcoat may be applied after the color or stain has dried. This additional layer can help protect the cabinets from everyday handling, moisture, cleaning, and general wear. The need for a topcoat depends on the type of paint or finish used, so homeowners should follow the product requirements rather than assuming every project needs the same treatment.
The protective finish should be applied carefully to avoid drips, uneven areas, or unwanted texture. Proper drying and curing time is also important. A surface may feel dry while still being vulnerable to damage from handling. Allowing the finish to cure properly can help improve its durability and reduce the risk of premature marks or scratches.
Reinstalling Cabinet Components
Once the refinished surfaces have dried and cured sufficiently, the cabinet doors, drawers, and hardware can be reinstalled. Components should be handled carefully because freshly finished surfaces may still be more vulnerable to damage than fully cured coatings. Doors and drawers should be aligned properly so they open and close without rubbing against surrounding surfaces.
This stage also provides an opportunity to install updated hardware. New knobs, handles, and hinges can complement the refinished cabinets and provide another visual improvement. Hardware can be selected to match the new cabinet color and the overall design of the room. Careful reassembly helps complete the transformation and ensures that the cabinets remain functional as well as attractive.
Inspecting and Maintaining the Finished Cabinets
The final inspection is an important part of the cabinet refinishing process. The completed surfaces should be checked for uneven coverage, missed areas, drips, scratches, or other imperfections. Small touch-ups can be completed before the project is considered finished. Doors and drawers should also be tested to make sure they operate properly.
Maintenance can help preserve the new finish after the project is complete. Cabinets should be cleaned using methods appropriate for their coating and material. Excessive moisture, abrasive cleaners, and harsh chemicals may damage some finishes. Regular gentle cleaning can help prevent buildup and maintain the appearance of the cabinets. Proper care can extend the useful life of the refinished surface and keep the cabinets looking fresh.
Final Thoughts
The cabinet refinishing process involves much more than applying a new color to an old surface. Inspection, removal of components, cleaning, repairs, sanding, priming, finishing, protective coating, reassembly, and final inspection all contribute to the result. Proper preparation is especially important because the quality of the underlying surface directly affects how the new finish looks and performs. Choosing suitable products and allowing enough time for drying and curing can also improve durability. With careful attention to each stage, cabinet refinishing can give existing cabinetry a refreshed appearance while preserving its original structure and functionality.