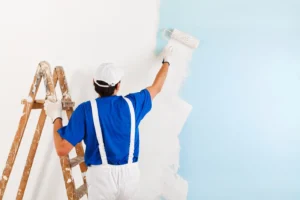
NWA Painter is one of the most versatile and common home decorating techniques. It can be done in many ways, ranging from ragging to sponge painting.
Generally speaking, it is best to tape the trim and paint the walls. However, some pros prefer the freehand cutting-in method that doesn’t require taping.
The preparation for an interior painting project is one of the most important steps, and it can make all the difference in a finished paint job that looks professional. The right preparation techniques will help ensure that the new coat of paint goes on evenly and stays put for a long time. Proper surface prep includes cleaning, scraping off old, loose paint, sanding, caulking gaps and seams, and more. It can be a labor-intensive task, but getting the best results from your painting project is necessary.
During the initial preparation process, your professional contractor will visually inspect the room and discuss any repairs or other changes you may want to consider. It’s also important to decide on a clear vision for the finished product, including color choices, paint types and textures, and other design elements. This will help you make informed decisions throughout the project and ensure that the final result is exactly what you had in mind.
Next, your professional contractor will clean the walls and ceilings to prepare them for the upcoming paint job. This step is critical because it helps ensure that your walls are free of dirt, dust, and other debris that could interfere with the adhesion of the new paint. Depending on the type of wall finish, this might involve light sanding or require more extensive cleaning and scrubbing.
Once the walls are clean, your professional contractor will cover any furniture or other items you don’t want to be painted with tarps, plastic, paper, and drop cloths. It’s also a good idea to remove any small knick-knack items and move them out of the room, as they can easily get knocked off or damaged during the painting process.
Finally, covering any floors or surfaces you don’t want to be covered with a tarp or drop cloth is important. This will protect them from stains or damage while the painting is done and save you a lot of cleanup later on. Once this is completed, it’s time to start the painting!
Paints are one of the most important elements in interior home painting, and they contribute significantly to the mood and tone of a room. They can also give a new dimension to moldings and trim. Some professional painters even use patterns and murals on walls to add a touch of elegance. But for most homeowners, choosing the best colors to suit their needs can be challenging.
There are many factors to consider when choosing an interior paint color, such as natural light, ceiling height, and type of flooring. Other important considerations include your taste and the overall style of your home. Fortunately, new app-based technology makes it easier to visualize the effect of different paint colors in your space.
The most popular interior paint colors are neutral shades like beige, white, and gray. Trendy earthy tones, including green, are also popular. Real estate agents often prefer neutral colors, allowing potential buyers to envision their furniture in a room. They are also easier to clean and scuff-resistant, ideal for kitchens and high-traffic areas.
When selecting interior paint colors, it is important to consider your lifestyle and resale value. If you plan to sell your home in the future, it is a good idea to stick with classic colors that are timeless and easy to match with other decor. This will help ensure that your home stands out in the market and will be appealing to prospective buyers.
In addition to color, it is also important to choose the right finish for your interior paint project. Interior paints come in various finishes, such as matte, eggshell, satin, and semi-gloss. The sheen of the paint determines how glossy and reflective it will be. High-gloss interior paint is ideal for high-traffic areas, as it is scuff-resistant and easily wipes clean. Eggshell is a good bedroom choice; satin and semi-gloss are perfect for living rooms.
When choosing your paint colors, looking at the color palettes used in magazines and websites is important. This will give you an idea of what colors are popular in your area and will look best on your walls.
Whether you want to add a fresh coat of paint to your home’s exterior or give the interior a makeover, you can do it with the help of an experienced residential interior painting company. Professional painters know how to prepare surfaces and use the right tools to complete the job. They can take the stress out of your project and provide you with a beautiful finish that will last for years.
Preparing the wall surface is crucial to the final results of a painting project. This can be done by scraping loose or flaking paint and sanding rough areas to smooth the surface. It is also important to patch any holes, cracks, or dents in the surface of the walls before painting. This is usually done using a lightweight joint compound, sanded smooth with a sanding sponge after it has dried. If necessary, caulking is used around windows and trim to seal the joints and prevent water or insects from entering the space.
When painting indoors, there must be adequate ventilation. This is because paint fumes contain volatile organic compounds (VOCs), which harm human health when inhaled. This is why professional interior painters always wear masks to protect themselves from the fumes.
A fresh coat of paint is one of the easiest ways to transform a room and give it a new look. However, the process can be time-consuming and complicated if you’re unfamiliar with it. Hiring a residential interior painting contractor can save you the hassle of preparing the space and significantly cut the completion time. A professional can advise you on color options, a vital aspect of any painting project. They can assist you in choosing a paint that will complement the furnishings and fixtures in your home and enhance their overall appeal. They can even recommend special effects such as stenciling and faux finishes to make your rooms stand out. Aside from making your home more comfortable, a fresh coat of paint can also increase the value of your property, especially if you plan to sell it in the future.
Painting is a skill-intensive project that can take some time to master. Professional painters have developed certain procedures over the years that make their jobs go faster and look better. With some knowledge and insider tips, you can create an outstanding wall paint job in your home or office.
Preparing for an interior painting project is a complex process that involves several different steps. Before you start the painting, outline the process and create a work checklist. This will help you anticipate any problems and give you a sense of structure and direction for your project. It will also ensure that you remember all important steps.
Surface preparation is one of the most crucial aspects of a quality paint job. This includes thoroughly cleaning the walls and scraping off any loose paint. Reproducing cracks or holes with a caulking compound is also a good idea. Finally, you should lightly sand the walls to smooth them and prepare them for a fresh coat of paint.
Before you begin painting, covering your furniture and belongings with canvas drop cloths is a good idea. This will prevent spills or splatters from damaging your carpeting or wood flooring. Placing plastic sheeting in the area where you will be working is also a good idea. This will protect your carpet and floor from drips or splatters during paint application.
When it comes to painting, many different types of finishes are available. Some are more durable than others, and some offer a more glossy finish. Deciding what finish you want before purchasing the paint would be best.
When you finish painting, allowing the paint to dry for 24 hours before touching or moving anything is a good idea. After that, you should carefully remove any tape that is still in place. Using a utility knife instead of your fingernails to remove the tape is a good idea. This will help to avoid pulling up any of the walls with the tape.